Emailing registrants
With our platform, you have the option to send emails to either all of your registrants or specific registrants.
To access the "Mass Email" section, just follow these simple steps:
- Navigate to the View Registrantssection, where you can view the information of your registered participants.
-
To email registrants you have two options:
-
Click the "Mass Email" button located at the top of your list.

-
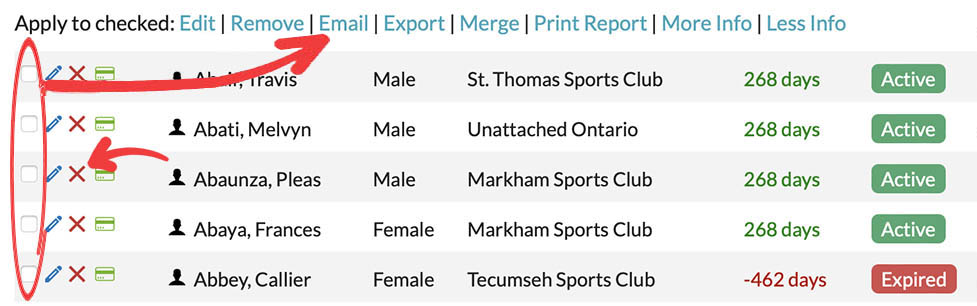
Check the checkbox to the left of the registrant's name, and then click the "Email" link next to "Apply to checked".
-
Please explore the following options to discover more about the "Mass Email" section.
The interface for the "Mass Email" feature is presented below:

Settings
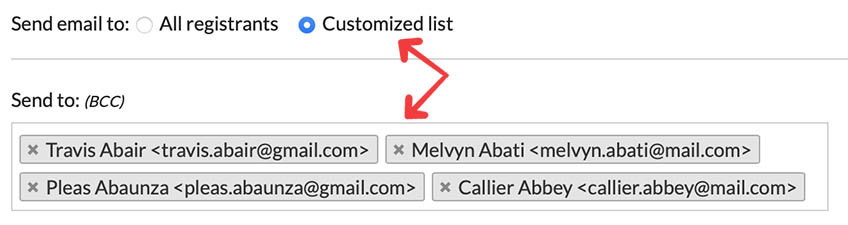
You have the following options:
- All registrants: This option allows you to send an email to all of your registrants.
- Customized list: This option allows you to send an email to a subset of your registrants.
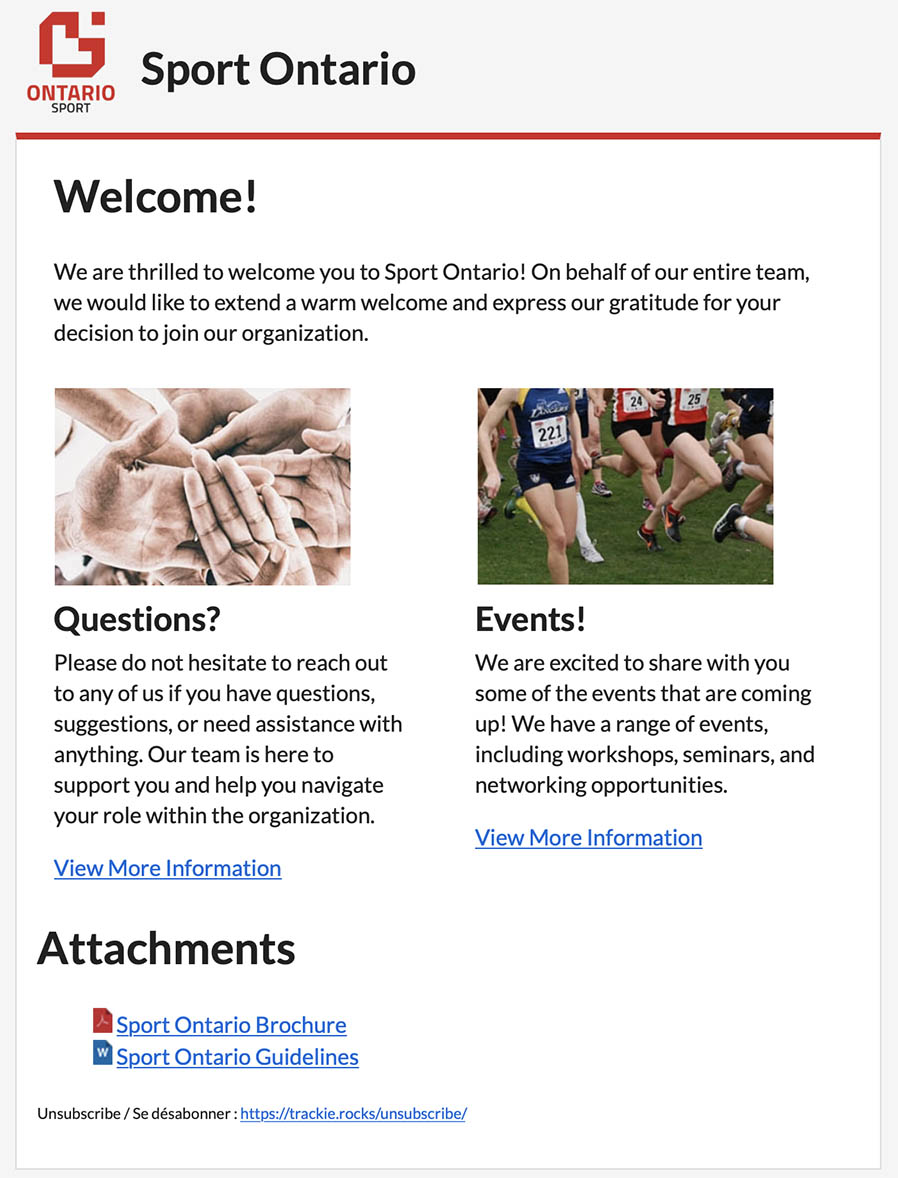
Here's an example of how the actual email looks once sent:
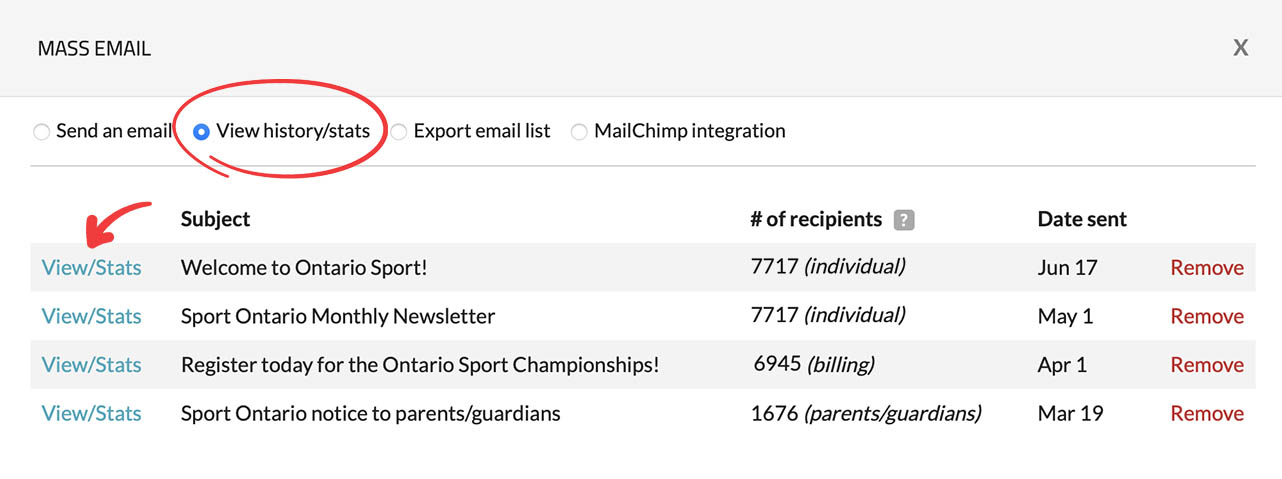
After sending emails, you can view past messages and track statistics on deliveries, opens, bounces, and clicks.
To access the email history and statistics, simply select the "View history/stats" radio button and click on the "View/Stats" link next to the email you wish to review.
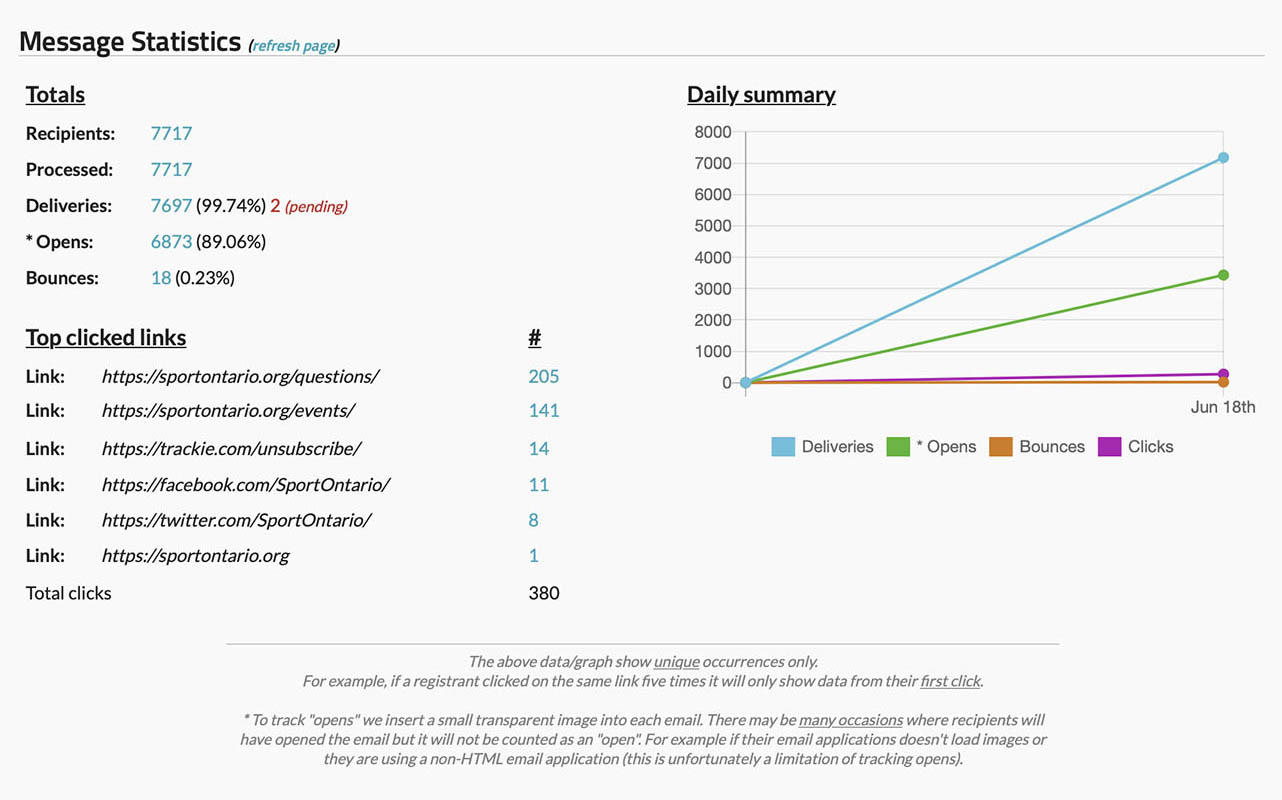
Upon clicking the link, you will be directed to the "Message Statistics" interface, which will be displayed as depicted below.
Settings
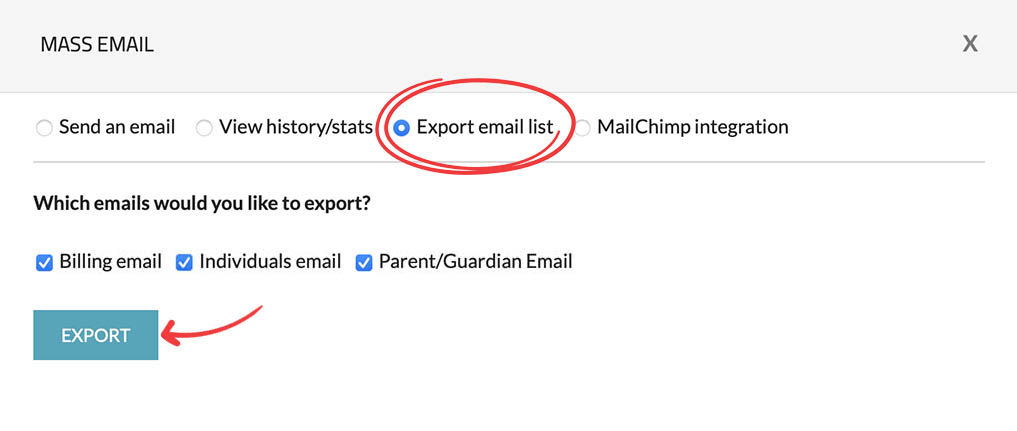
You have the option to export your email list if necessary. This can be beneficial if you wish to import your list into an external program or open it in software like Microsoft Excel.
To access the export functionality, you can select the "Export email list" radio button, choose the emails you wish to export, and then click the "EXPORT" button to initiate the export process.
Our system offers a seamless integration feature that allows you to connect your registration email list with an external MailChimp account. MailChimp is a popular email sender company, and you can find more information about their services on their official website: https://mailchimp.com.
To establish a connection between your registration email list and MailChimp, please follow these steps:
-
Select the "MailChimp integration" radio button.

-
Enter your MailChimp API key in the input box. If you need assistance in finding your API key, you can refer to this article for detailed instructions.
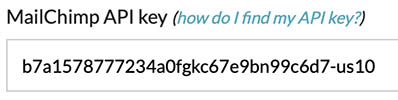
Your API key will resemble something like above (please note that this is not a real key, it is used for illustrative purposes only).
-
After clicking "SUBMIT" you will be presented with a screen like the below:
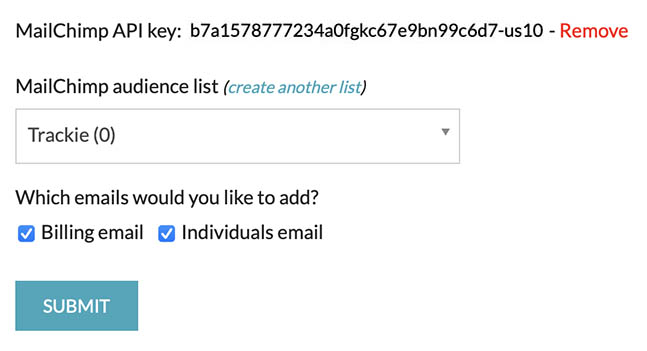
Select the MailChimp audience to which you want to import your registration email list, the emails you want to import, and then click on the "SUBMIT" button to initiate the process.
-
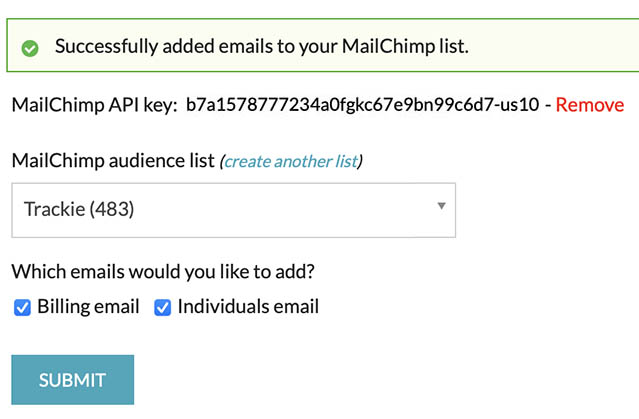
Please note that the import process may take several minutes, depending on the size of your list. Once completed, you will receive a success message displayed at the top of your page, along with the total number of emails that have been successfully imported to your MailChimp audience.
-
After successfully importing your registration email list to your MailChimp audience, you can log in to your MailChimp account to send emails to your registrants.